If you check out my side bar you will see the result of a Friday night every twenty-something dreams of - my label cloud. really though, for me, this was a great way to spend a friday night. I'd love, someday, to learn more about writing html. i've done a little and kind of love it.
i digress. back to the cloud. basically it is a *itch to get it to work and will result in lots of reloading of your blog to check that whatever little tweek you just did is working correctly.
since i did this a few weeks ago i will try to remember some pointers to add to the tutorial here.
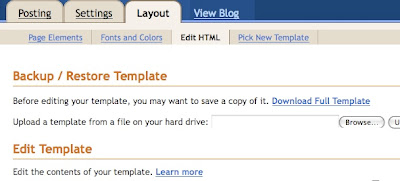
1. BACK UP YOUR CURRENT TEMPLATE. do this by going to your blog's layout page and clicking on 'edit html' then click 'download template' save it somewhere you can find it.

2. I am pretty sure this only works if you are using a blogger template and not third party html. I found this out AFTER i spent several hours making this work and will now never use a blog designer template for fear of having to do it again. BUT you can try it and maybe it works??
3. You have to have some posts already labeled. And the label with the most posts will be the biggest in your cloud so if it is something you don't want to draw attention to you might think again about making a cloud?
4. Ok so i think you should now be ready to play with the html. If you haven't done this before mentally prepare yourself for confusion and probable annoyance at the fact that a lot of things will begin with the same tag and you have to look at things very carefully.
5. Do as the tutorial tells you and find the appropriate spot to paste the three sections of html. I believe at this point you can click preview and see how it looks so far.
6. There are lots of tweaks you can do now to make it look the way you want.
- Size of the most and least frequently used labels - all of the other labels will be sized gradually between these two things.
- Color of the most and least freqently used labels - again the html is written so they others will change color graually in a continum of these colors. I, for some unknown reason, could not get this to work. I ended up just using one color that is on my blog already (i will explain this in a moment). The labels in my cloud that appear brown (see picture above) are links that have been clicked on. So originally they were all the default of blue, but the ones i've clicked on to find certain posts turn brown. make sense??
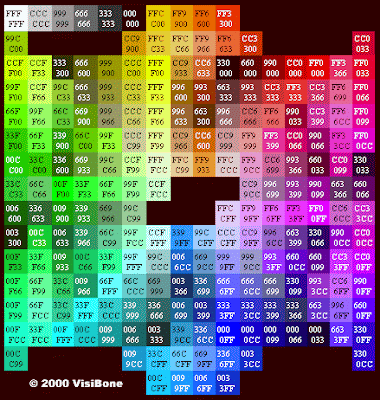
- To find colors in general use a RGB color code chart like this one. All colors that appear on webpages have a hexadecimal code that is written into the html. Find the color you like and paste the code in the the html where the tutorial tells you to.

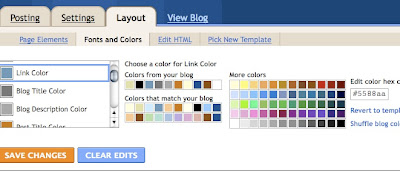
- To find the codes of colors already used in your blogger template go to the layouts tab and click on 'fonts and colors'. Do you see how my 'link color' is highlighted in this picture? Now look all the way to the right - see the color hex code in the little box? that is how you figure out the exact code for colors already in your blog. If you aren't a matchy, anal freak like me then just find a color you like and put in in where the tutorial tells you too.

- The last thing you can change is whether or not to show the number of posts associated with a particular label. I don't like the way that looks so i didn't do it, but - to each their own.
hmmm... i'm pretty sure that whole thing is pretty incomprehensible. but good luck to you. and remember to pick colors you love because after you've spent all night doing this you will never ever wish it upon yourself again.
i, of course, have been wanting to pretty up my blog for while now and chose to do this without realizing i would wish for different colors almost immediately. so it goes...
***update*** i wrote this post before i 'prettied up' by blog, but when i did the colors totally changed when i changed the default colors! so you don't have to marry the colors - just date around.


1 comment:
super thank you! mine look great!
Post a Comment